Your shared hosting plan gives you a website on our servers, managed with cPanel. This guide covers the first things to do after you order.
1. Find your hosting service
- Log in to the Client Area.
- Go to Services > My Services and click your hosting plan (for example Shared Hosting Starter).
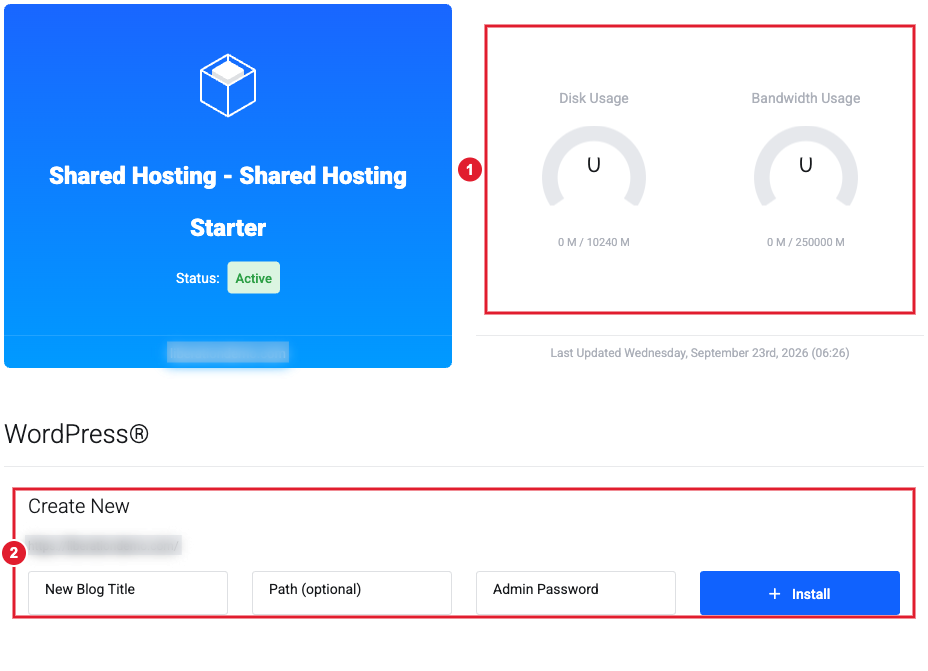
(1) Disk space and bandwidth used this month (2) Install WordPress in one step
The service page shows your plan, how much disk space and bandwidth you're using, and shortcuts to common tools. The menu on the left has the most important actions:
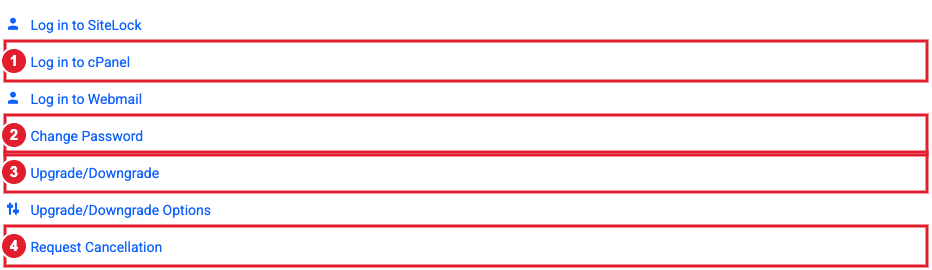
(1) Log in to cPanel (2) Change your cPanel password (3) Upgrade to a bigger plan (4) Request cancellation
2. Log in to cPanel
Click Log in to cPanel. You're signed in automatically, with no separate password to remember. cPanel is where you manage your files, databases, domains, PHP settings and security.
3. Point your domain to your hosting
If you registered your domain with us and use our default nameservers, it already points to your hosting. If your domain uses other DNS (for example Cloudflare or another registrar), point its A record to the Shared IP Address shown in cPanel's General Information panel. See A Records and Managing Your DNS Records.
4. Build your website
- WordPress: use the WordPress box on your service page (see Install WordPress from the Client Area), or WordPress Management in cPanel. See WP Toolkit.
- Site Builder: click Edit Website at the top of cPanel to build a site with drag and drop, no code needed.
- Upload your own site: use File Manager in cPanel, or an FTP program (see FTP Accounts). Moving an existing WordPress site? See Move a WordPress Site to Your Hosting.
5. Turn on HTTPS
Once your domain points to your hosting, install a free SSL certificate so your site loads over https. See Install a Free SSL Certificate. Then turn on Force HTTPS Redirect for the domain under Domains in cPanel (see Domains and Subdomains).
6. Email
Shared hosting plans don't include email in cPanel. Use Liberation Email for mailboxes on your domain. It works alongside your website. See Getting Started with Liberation Email and DNS Records Needed for Liberation Email and Hub for Teams.
Common tasks
- Back up and restore your website
- Change your PHP version and PHP settings such as memory limit and upload size
- Create a MySQL database and user
- Add domains and subdomains and set up redirects
- Edit DNS records in cPanel (Zone Editor)
- Set up a cron job
- Change your cPanel password
- Block an IP address
- Manage your files with File Manager
- Move a WordPress site to your hosting
- Import or export a database with phpMyAdmin
- Restore a single file or folder from a backup
- Scan your site for malware (Imunify360)
- Check your disk space and resource usage
- See your website statistics and error logs
- Connect with SSH, SFTP or Terminal
- Update your cPanel contact email and notifications
Need a hand? Open a support ticket and we'll help.