The Client Area separates you (the person who logs in) from your account (the business or household that owns the services and pays the invoices). Knowing the difference makes it easy to update the right details and to share access safely.
The four places at a glance
| Page | What it controls | Where |
|---|---|---|
| Your Profile | Your own name and the email address you log in with. | Your name (top right) > Your Profile |
| Account Details | The account's company name, billing address, phone, language, default payment method and email preferences. | Your name > Account Details |
| User Management | Other people who can log in and manage this account, and what they're allowed to do. | Your name > User Management |
| Contacts | People who receive copies of certain emails (like invoices) but can't log in. | Your name > Contacts |
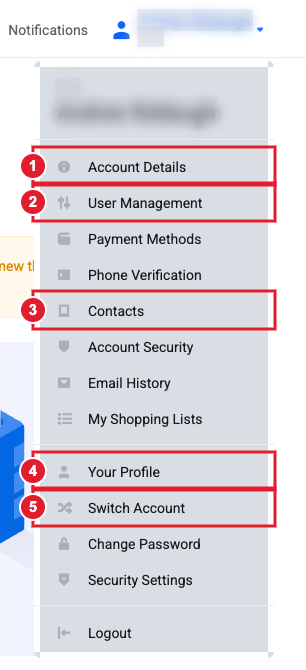
All of these are in the menu under your name: (1) Account Details (2) User Management (3) Contacts (4) Your Profile (5) Switch Account
Your Profile: the person logging in
Change your first name, last name or login email here. When you change the email, we send a verification message to the new address, and you need to click the link in it. Your password and two-factor authentication belong to your login too. See How to secure your Client Area account.
Account Details: the account itself
This is what appears on your invoices. Update the fields and click Save Changes.
Further down the page you can pick a Default Billing Contact, choose which email types you receive, and join or leave our mailing list. See How to choose which emails you get and find an email we sent you.
User Management: people who can log in
- Go to your name > User Management and click Invite New User.
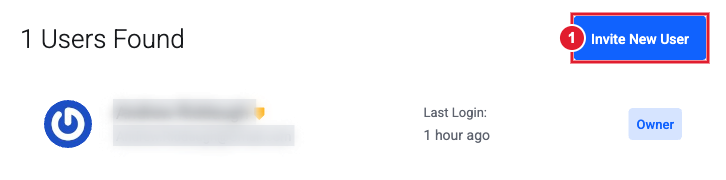
- Enter their email address.
- Choose All Permissions, or Choose Permissions to allow only certain things. For example, a bookkeeper might only get View & Pay Invoices, and a web developer might get View Products & Services, Perform Single Sign-On and Manage Domain Settings.
- Click Send Invite. They accept from their email and sign in with their own password.
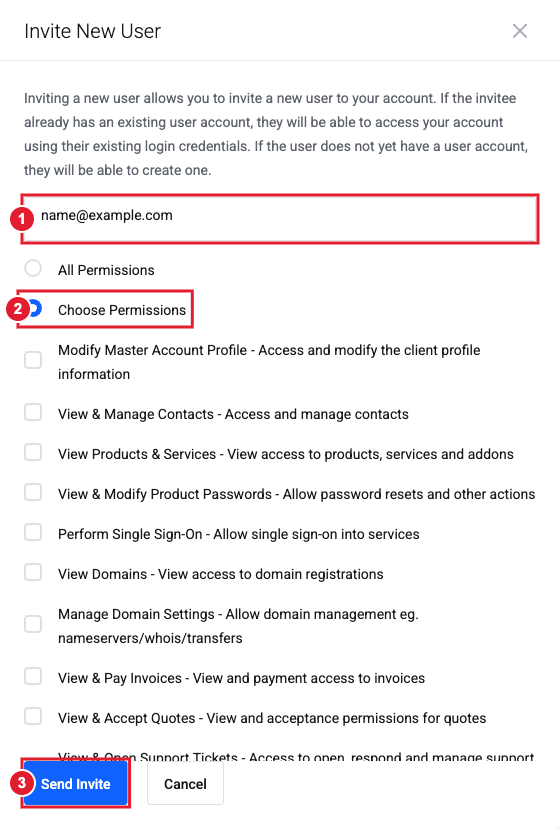
(1) Their email address (2) Choose Permissions to pick exactly what they can do (3) Send Invite
The permissions you can give are:
- Modify Master Account Profile
- View & Manage Contacts
- View Products & Services
- View & Modify Product Passwords
- Perform Single Sign-On
- View Domains
- Manage Domain Settings
- View & Pay Invoices
- View & Accept Quotes
- View & Open Support Tickets
- View & Manage Affiliate Account
- View Emails
- Place New Orders/Upgrades/Cancellations
To remove someone, click Remove Access next to their name. The Owner always has full permissions and can't be removed.
Contacts: people who get emails but don't log in
Go to your name > Contacts, choose Add New Contact, fill in their details and tick the email types they should receive, such as invoices. This is ideal for an accountant who only needs copies of invoices.
Switch Account: one login, several accounts
If you've been invited to more than one Liberation account (for example your own business and a client's), your name > Switch Account lists them all. Pick one to manage it. Your login and password stay the same.
To hand the whole account to a new owner, see How to give someone access to your account, change your login email, or transfer ownership.
Still need help?
Open a support ticket and include the details listed above so we can resolve it on the first reply.