If your domain uses our Cloudflare CDN service, you can manage its Cloudflare settings (DNS records, SSL, caching, page rules and more) right from the Liberation Client Area. You don't need a separate Cloudflare login.
Open the Cloudflare manager
- Log in to the Client Area.
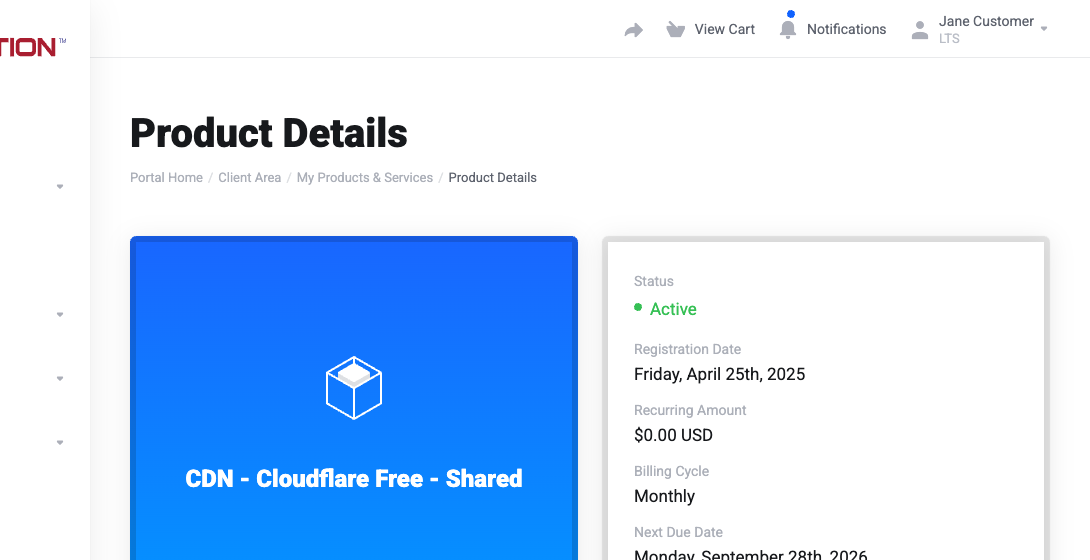
- Click My Services and open your CDN - Cloudflare service for the domain you want to manage (or click Manage next to it on your dashboard). Make sure the status shows Active.
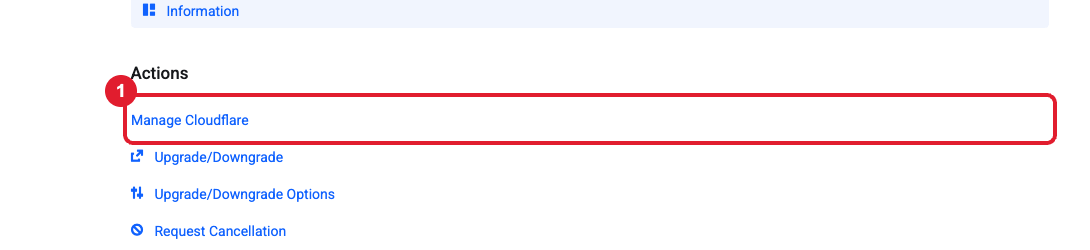
- Scroll down to Actions and click Manage Cloudflare (1).
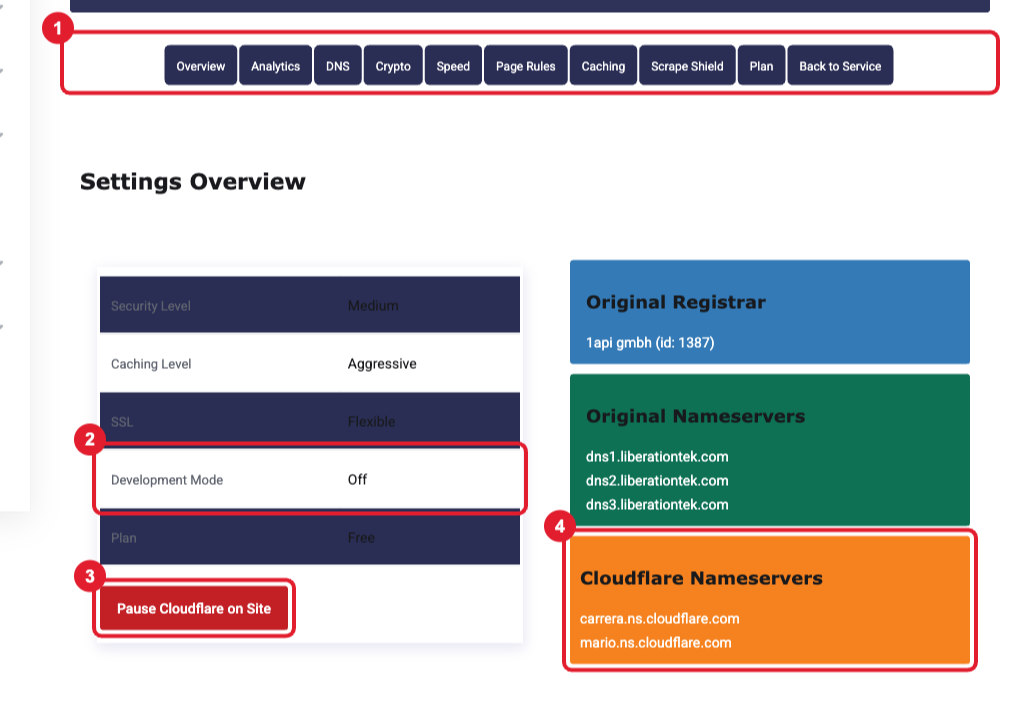
- The Cloudflare manager opens on the Overview page. Use the menu (1) to move between sections. From Overview you can also turn on Development Mode (2), Pause Cloudflare on Site (3), and see the Cloudflare Nameservers (4) your domain must use.
Important: The service must be Active. If you see "Product must be active to perform this action", the service is suspended, usually because of an unpaid invoice. Pay it from Billing > My Invoices and the manager becomes available again.
What each section does
| Section | Use it to… |
|---|---|
| Overview | See the security level, caching level, SSL mode and plan. Turn on Development Mode, pause Cloudflare, and view the nameservers. |
| Analytics | View traffic, bandwidth saved and threats blocked. |
| DNS | Add, edit or delete DNS records (A, AAAA, CNAME, MX, SPF, TXT, NS). |
| Crypto | Choose the SSL mode (Off, Flexible, Full, Strict), and set up HSTS and Always Use HTTPS. |
| Speed | Turn on performance features such as auto-minify. |
| Page Rules | Create URL redirects (forwarding) and per-page cache or security settings. |
| Caching | Set the caching level and browser cache time, purge the cache, and turn on Always Online or Development Mode. |
| Scrape Shield | Hide email addresses from bots and turn on hotlink protection. |
| Plan | See or change your Cloudflare plan. |
Add or change a DNS record
Use this when a web developer or another service (Shopify, Google, Microsoft 365, an email marketing tool) asks you to "add this record" or "put this code in your DNS".
- Click DNS in the Cloudflare menu and scroll to DNS Records.
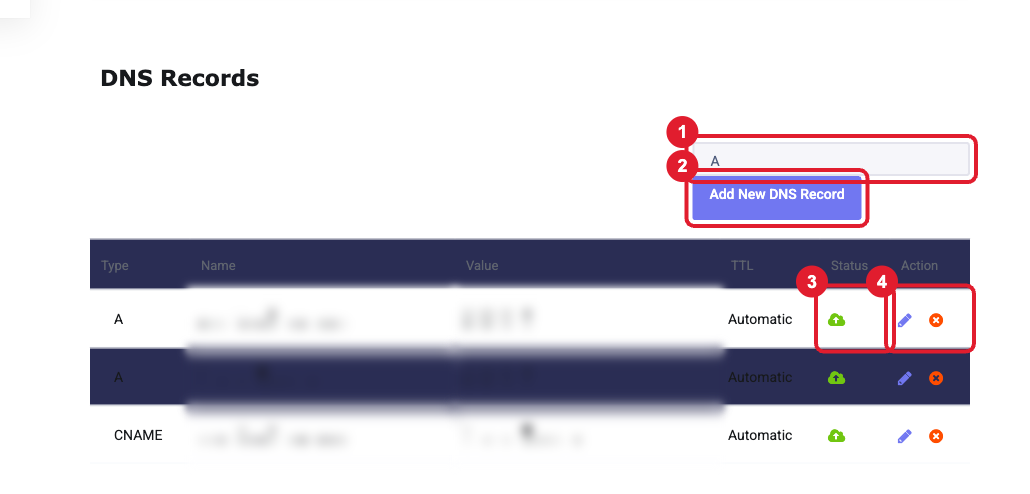
- (1) Choose the record type from the drop-down (A, CNAME, MX, TXT, and so on), then click (2) Add New DNS Record. Existing records are listed below. The cloud icon (3) shows whether a record is proxied through Cloudflare, and the icons under Action (4) let you edit or delete a record.
- In the Add DNS Record window, confirm the (1) Type. Enter the (2) Name (use
@for the main domain, or a subdomain such aswwwormail) and paste the (3) Content exactly as you were given it. Leave (4) TTL on Automatic and click (5) Continue.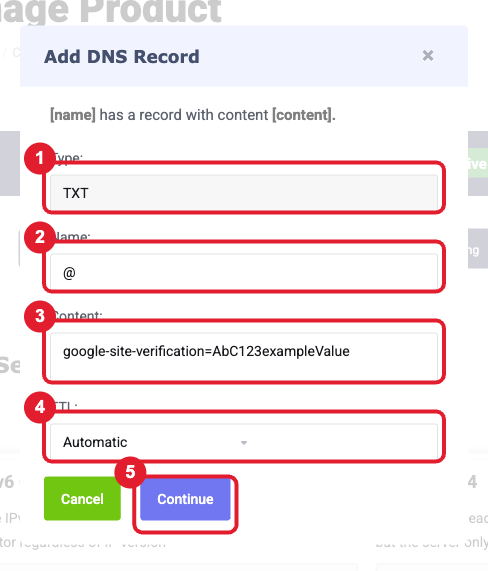
- Most changes take effect within a few minutes. Some outside services take longer to "see" a new record, so wait 15–30 minutes before clicking their Verify button.
Tip: Mail records (MX, SPF/TXT, DKIM) and verification records must be DNS only (grey cloud), not proxied. Only website records (A / CNAME for your domain and www) should be proxied (orange cloud).
Important: When your domain uses Cloudflare, the Cloudflare DNS page is the only place DNS changes take effect. Changes made in the cPanel Zone Editor or in Domains > DNS Management are ignored while Cloudflare is active.
Your website changes aren't showing
- Click Caching in the Cloudflare menu.
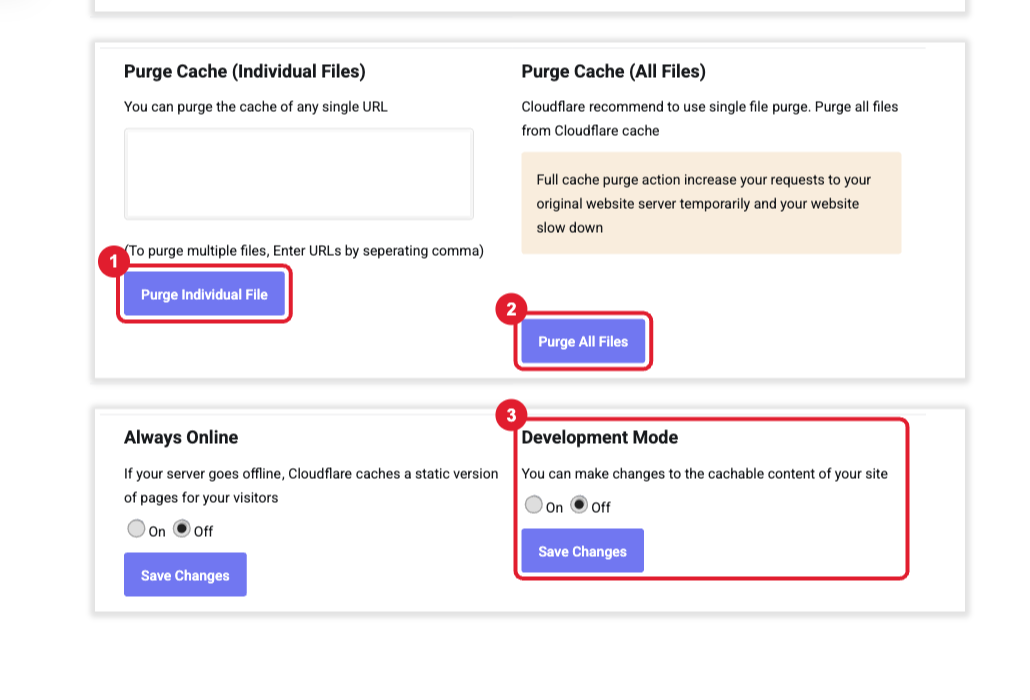
- To refresh one page or file, enter its full URL and click (1) Purge Individual File. To clear everything, click (2) Purge All Files. While you're actively editing your site, you can switch (3) Development Mode to On, which bypasses the cache and turns itself off after 3 hours.
- Hard-refresh your browser (Ctrl+F5 on Windows, Cmd+Shift+R on Mac).
Troubleshooting
- "Too many redirects" or SSL warnings: open Crypto and set SSL to Full (or Strict), then click Save Changes. All Liberation hosting includes a valid certificate. Flexible combined with a WordPress "force HTTPS" setting causes redirect loops.
- Cloudflare error 521, 522 or 525: Cloudflare can't reach your hosting server. Check that the A record for your domain on the DNS page points to your hosting server's IP address, and that your hosting service is active. If both look right, open a ticket.
- An error message inside the Cloudflare manager (for example Authentication error): take a screenshot and open a ticket. It's on our side and we'll fix it.
Still need help?
Include your domain name and a screenshot of what you see. Open a support ticket and include the details listed above so we can resolve it on the first reply.