Licenses decide what each user can use. Every user needs at least one license, and each license can be given to one user at a time.
See your licenses
- Log in to the Client Area.
- Click Hub for Teams in the menu. You can also go to Services > My Services, open your Hub service and click Click here to manage Hub for Teams.
- Click the Licenses tab.
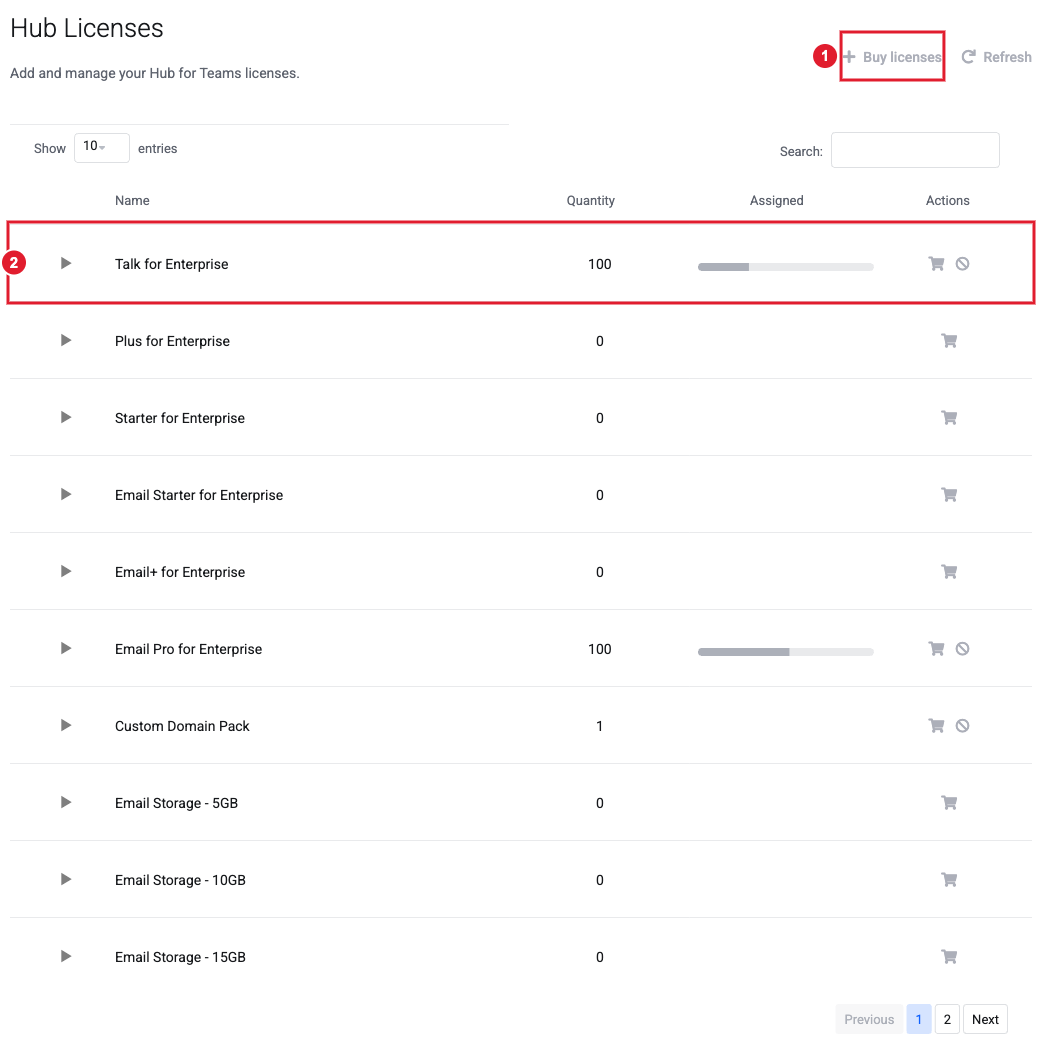
(1) Buy licenses (2) Each license type, with how many you own and how many are assigned
Types of license
- Hub licenses (for example Starter, Plus or Talk) give a user access to the Hub apps: Files, Chat, Calendar, Contacts, Deck and more.
- Email licenses (Email Starter, Email+ and Email Pro) give a user a mailbox. The higher tiers include more mailbox storage.
- Email Storage (5, 10 or 15 GB) adds extra mailbox space.
- Custom Domain Pack lets you use your own domain for email. See Adding Your Custom Domain to Your Hub.
The license names you see depend on your Hub plan.
Buy more licenses
- On the Licenses tab, click Buy licenses.
- Choose the license and quantity, then check out.
- Once the order is paid, the new licenses show on the Licenses tab, ready to assign.
Give a license to a user
- New user: tick the licenses on the second step of Create new. See Adding a User to Your Hub.
- Existing user: open the user from User Accounts, go to the Licenses tab and tick the license. See Managing Hub Users.
To free up a license, untick it on the user's Licenses tab, or disable or delete the user.