Your calendar and contacts in the Liberation Mail webmail can sync to your phone and computer, so changes show up everywhere. Hub users: see Apple Device Configuration (Hub) instead.
iPhone, iPad and Mac (easiest)
The webmail can make a setup profile that adds your calendar or contacts in one step.
- Sign in at mail.liberation.email on the device, and open Calendar (or Address Book) from the icons at the top right.
- On the left, click the ⋮ menu next to Personal Calendar (or Personal Address Book).
- Click Download iOS - MacOS configuration profile.
- Open the downloaded profile. On iPhone or iPad, go to Settings > Profile Downloaded and tap Install. On a Mac, open System Settings > Privacy & Security > Profiles and install it.
- Enter your email password when asked.
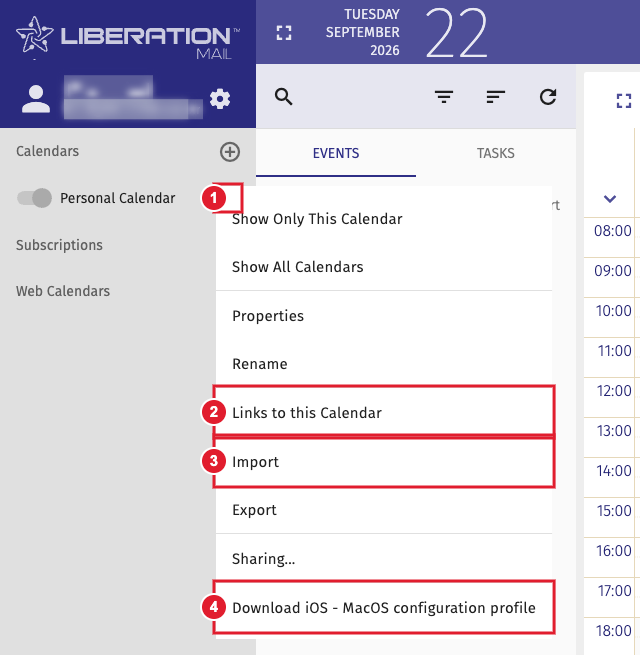
(1) Calendar menu (2) Links to this Calendar (3) Import (4) Download iOS - MacOS configuration profile
Find your sync links (CalDAV and CardDAV)
Other apps ask for a sync link (a URL). To find it:
- Calendar: open Calendar, click the ⋮ menu next to your calendar and choose Links to this Calendar. Copy the CalDAV URL.
- Contacts: open Address Book, click the ⋮ menu next to your address book and choose Links to this Address Book. Copy the CardDAV URL.
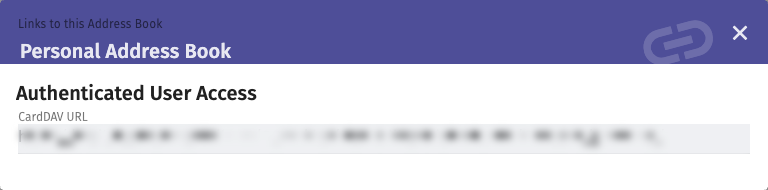
Sign in to the sync with your full email address and your email password.
Apple devices (manual setup)
If you'd rather not use a profile, add a CalDAV account (for Calendar) or a CardDAV account (for Contacts):
- iPhone/iPad: Settings > Apps > Calendar (or Contacts) > Calendar Accounts > Add Account > Other.
- Mac: System Settings > Internet Accounts > Add Other Account.
- Server: mail.liberation.email. User name: your full email address. Password: your email password.
- If it can't find your account, choose Advanced and paste the full CalDAV or CardDAV URL from above as the server address, with port 443 and SSL on.
Android
- Install DAVx5 from Google Play or F-Droid. If you also want tasks, install a tasks app it supports, such as jtx Board or Tasks.org.
- In DAVx5, tap + and choose Login with URL and user name.
- Paste the CalDAV URL from above as the Base URL, and enter your full email address and email password.
- Tap Login, pick the calendars and address books to sync, and allow the permissions it asks for.
Outlook on Windows
Outlook doesn't sync CalDAV or CardDAV on its own. The free Outlook CalDav Synchronizer add-in can sync them: add a profile, paste the CalDAV or CardDAV URL, and sign in with your email address and password. Thunderbird syncs calendars and contacts without an add-in. Paste the same links when adding a calendar or address book.