Cloudflare keeps copies of your images, stylesheets and scripts so they load fast. After you change your site, visitors may still see the old version for a while. Here's how to refresh it.
- Log in to the Client Area and go to Services > My Services.
- Open your CDN - Cloudflare service for the domain.
- Click Manage Cloudflare.
- Click Caching in the menu.
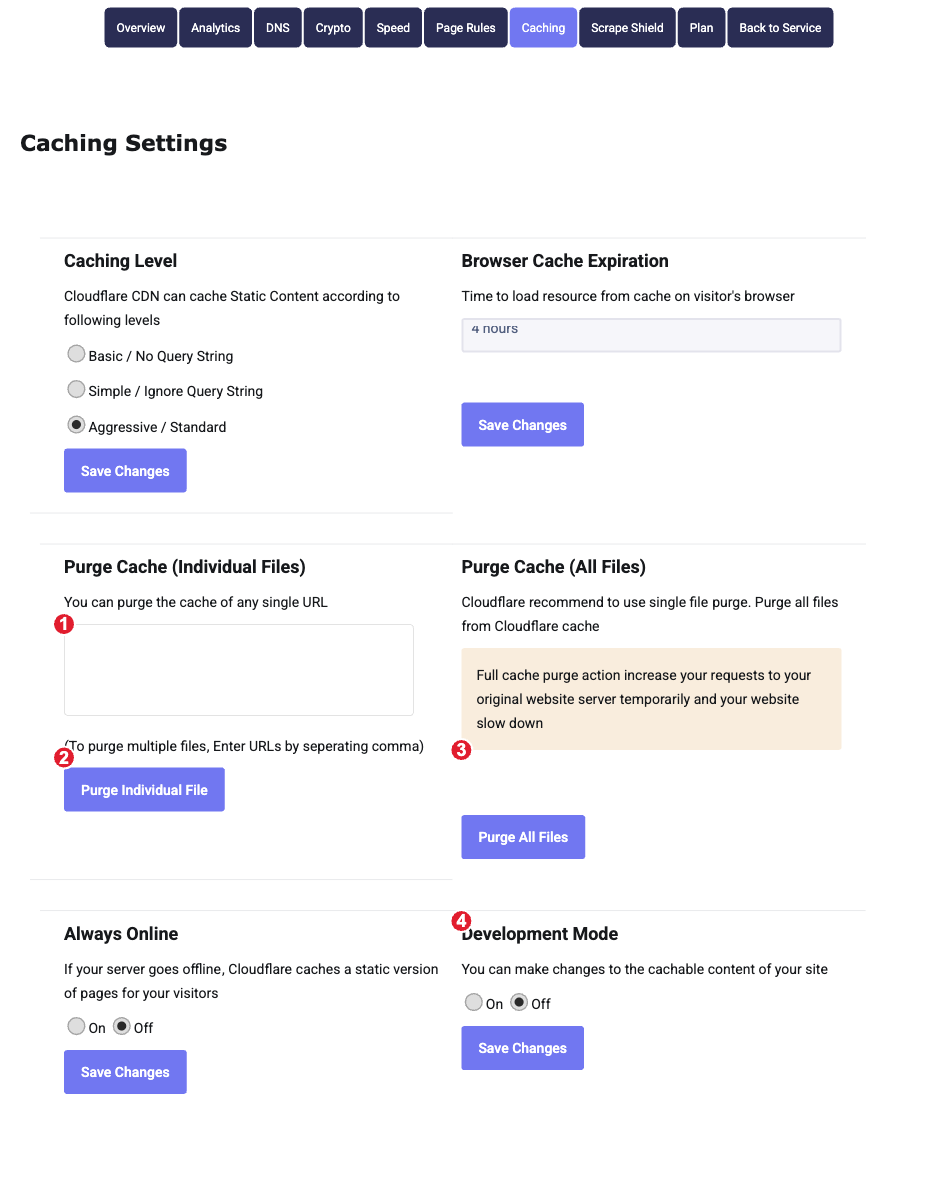
(1) URLs to purge (2) Purge Individual File (3) Purge All Files (4) Development Mode
Purge one or a few files
Enter the full address of each file or page, for example https://yourdomain.com/css/style.css, separated by commas, and click Purge Individual File. This is the gentlest option.
Purge everything
Click Purge All Files after a big change such as a new theme. For a short time every request goes to your hosting server, so the site may be a little slower until the cache fills again.
Development Mode
While you're actively editing your site, set Development Mode to On and click Save Changes. Cloudflare stops caching so you see every change straight away. It switches itself off after 3 hours.
Other caching settings
- Caching Level: Aggressive / Standard (the default) suits most sites. Simple ignores query strings; Basic only caches files without a query string.
- Browser Cache Expiration: how long visitors' browsers keep files. Respect Existing Headers lets your site decide.
- Always Online: if your server goes down, Cloudflare shows visitors a saved copy of your pages.