An SSL certificate lets your website load over https:// with the padlock in the browser. You can issue a free Let's Encrypt certificate yourself in cPanel.
- Log in to the Client Area, go to Services > My Services and open your hosting service.
- Click Log in to cPanel in the menu on the left.
- In cPanel, click SSL/TLS Certificates. You can also type its name into the Search Tools box at the top.
- On the Wizard tab, under Issue a certificate, tick your domain and its www version. Tick any other names you use, such as subdomains.
- Click Continue.
- Choose Let's Encrypt Certificate (free) and follow the steps to issue it.
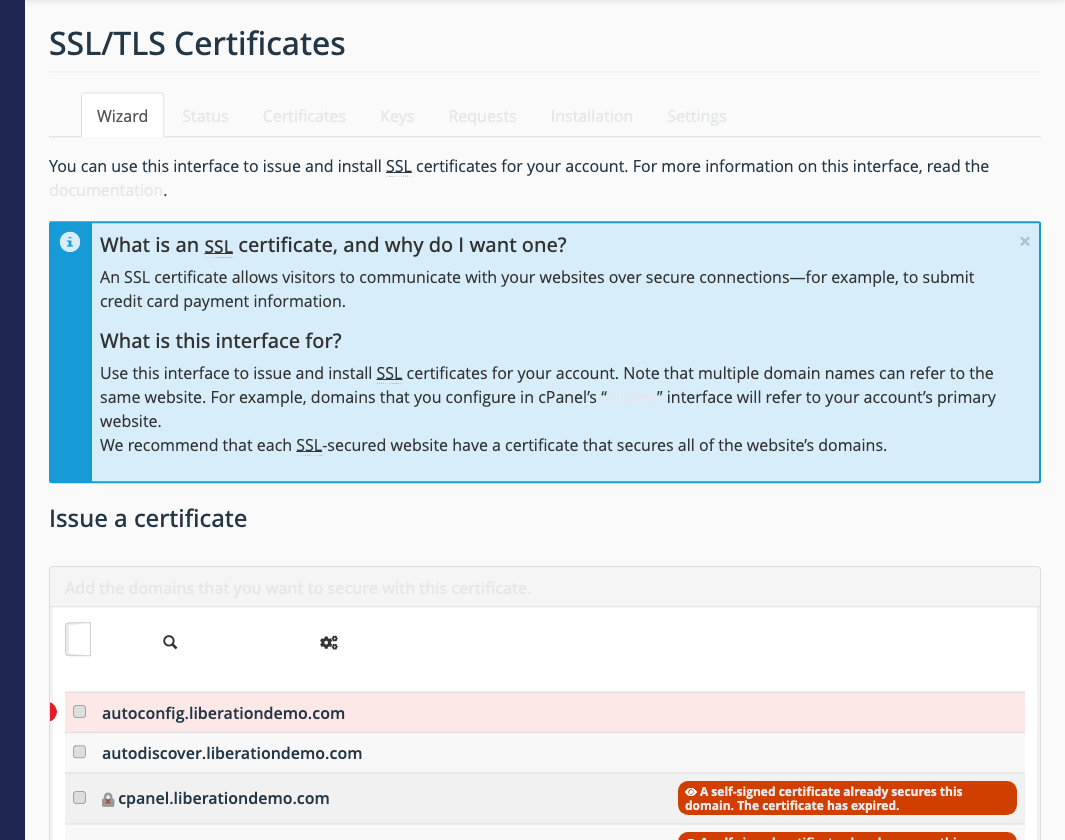
(1) Tick the domains to secure (2) Continue
The list also shows each name's current status, such as self-signed or expired, so you can see what still needs a certificate. The Status and Certificates tabs show certificates you already have.
After the certificate is issued
- Turn on Force HTTPS Redirect for the domain in Domains, so every visitor uses https.
- In WordPress, make sure Settings > General uses https:// for both addresses.
- Let's Encrypt certificates last 90 days. Check the Status tab now and then; if a certificate is close to expiring and hasn't renewed, repeat these steps.
Using Cloudflare?
If your domain goes through Cloudflare, the check may fail while Cloudflare's proxy (orange cloud) is on. Either set Cloudflare's SSL mode to Full and use Cloudflare's certificate, or pause the proxy while you issue the certificate here.
Want a paid certificate with a site seal or business validation? You can order one in the Client Area under Products > SSL Certificates. If issuing fails, open a support ticket and include the error message.